
I’ve spent a few days experimenting with Animoto, trying out every feature I came across. I made use of their free trial. You can even see my what my account looks like:
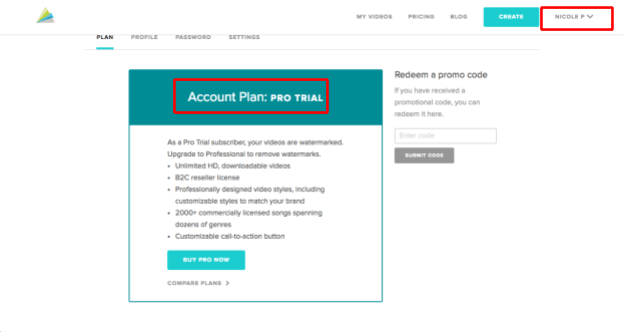
All of the screenshots in this review are from my experience. I made a few sample videos with my own images during my time with the program. See here and here for those examples. Last but not least, I also contacted the Animoto customer support team to evaluate the helpfulness of their responses. You can see my email interaction in the “Reasons Behind My Review and Ratings” section below.
What Is Animoto?
Animoto is a web-based program for creating videos from a collection of images. You can use it to make personal slideshows or mini marketing videos. They provide a variety of templates you can use to display your family vacation photos, professional photography skills, or your latest business products.
Is Animoto Free?
Animoto is not free. However, they do offer a free trial for 14 days of their midrange, or “pro” package. During the trial, any video you export will be watermarked but you have full access to Animoto’s features.
If you want to purchase Animoto, you pay monthly or a monthly rate per year. The latter is half as expensive in the long run, but unreasonable if you only plan to use Animoto infrequently. The image below shows the annual rates.

For more information on what each package allows you to do, visit Animoto’s pricing page.
Is Animoto Safe?
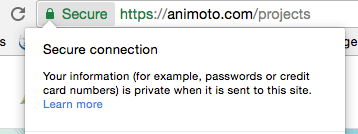
Animoto is safe to use. Although some might be wary because it is a web-based program as opposed to a downloaded application, the site is secured with HTTPS protocols which means your information is protected on their servers.
Additionally, Norton’s SafeWeb tool rates the Animoto site as completely secure with no malicious codes.
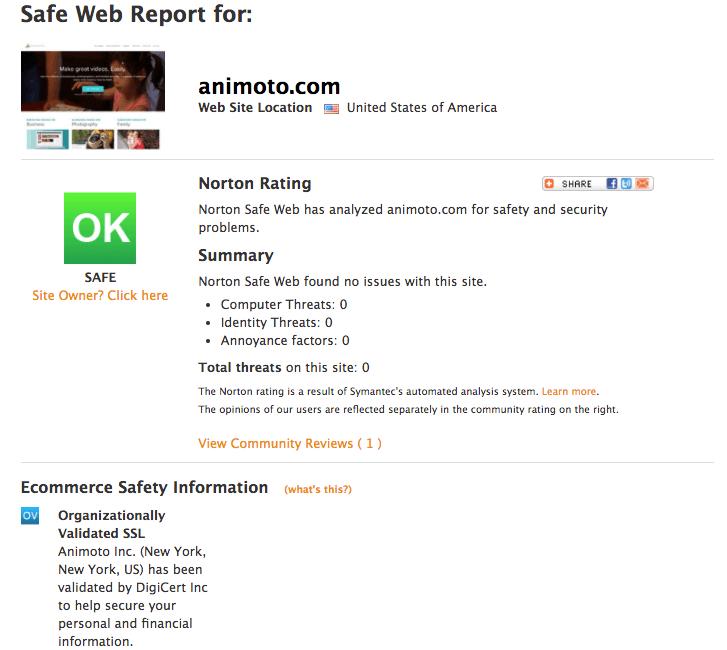
They’ve also confirmed that the site security certificate comes from a real business with an actual address. Transactions through the site are secure and legal.
How Do You Use Animoto?
Animoto advertises a three step process for making videos:

This is actually pretty accurate, especially considering how simple the program is to use. When you log in to the program, you’ll want to create a new project. Once you choose between slideshow or marketing, the program presents an array of templates to choose from.
When you choose, you’ll need to upload your media in the form of photos and videos. You can drag and drop to rearrange it, as well as add text slides. There’s plenty of customization options. Once you’re done, you can choose “produce” to export your video to an MP4 or share it through social media.
Animoto: What Does It Have to Offer?
Animoto is a very effective and easy to use tool for making photo-based videos. I experimented with the software to get an idea of what it was capable of. I used pictures I’ve collected from the past year or so. You can see the result here:
While I’m no professional photographer or video creator, this should give you an idea of the program’s style and use. Not all features listed are available at all levels of subscription to Animoto. Refer to the purchase page to see if a feature is restricted to higher price brackets.
Below is the collection of information and screenshots I gathered during my experimentation.
Slideshow vs. Marketing Videos
It’s the first question Animoto asks you when you begin creating a new movie: What kind of video do you want to create?
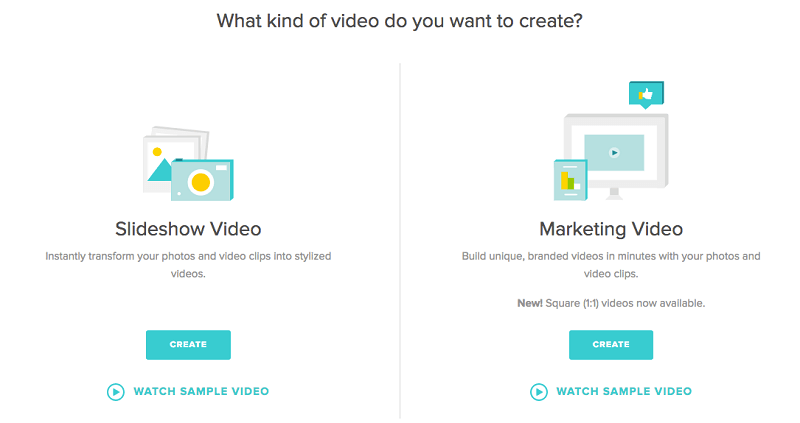
There are a few things that make them different from each other. First, what’s your goal? If you’re displaying family photos, creating a celebratory collage, or generally lack the need for text and subtitles, you should go with the slideshow video. This style is a bit more personal. On the other hand, a marketing video offers different aspect ratios and a set of templates that are geared toward promoting a small business, product, or new item.
Additionally, the editor for each type of video is slightly different. In the slideshow video editor, controls are more block-based. The toolbar is on the left, and has four main categories: style, logo, add media, and add text. In the main editing area, you can drag and drop to rearrange the timeline of the video or replace your music.
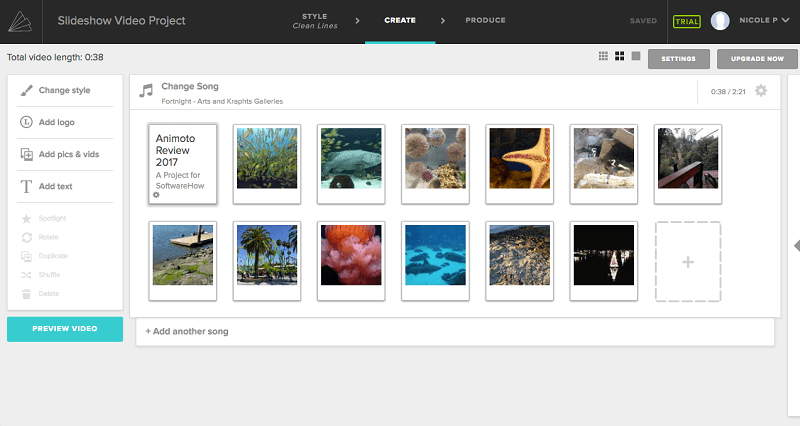
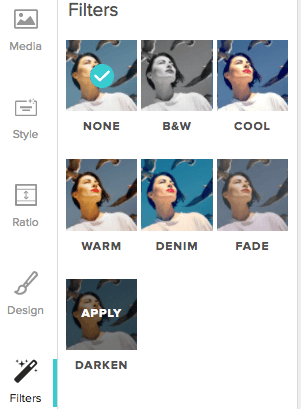
In the marketing editor, the toolbar has different options (media, style, ratio, design, filters, music) and is more condensed. Also, rather than uploading all of your media at once, it is stored on the side so you can choose what goes where to fit inside the template. Selecting a specific block from the editor will bring up even more tools related to text and visual appearance.
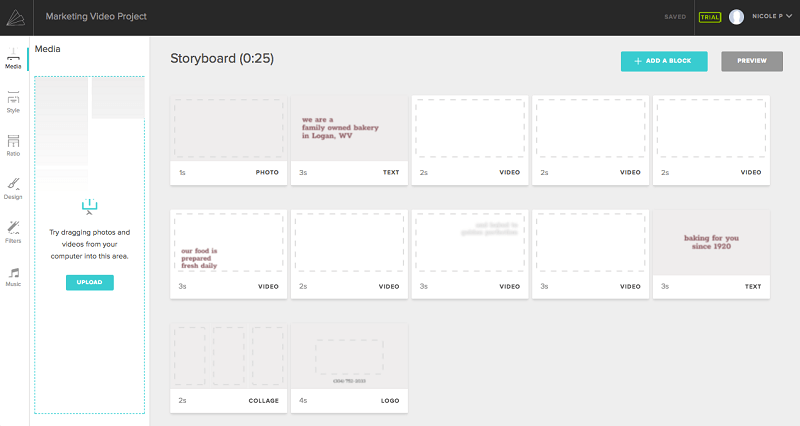
Finally, there are some differences in the media manipulation. For example, marketing videos allow custom image layouts rather than theme-generated options, along with overlaid text rather the separate slides. You have more control over font, color scheme, and logo.
Media: Images/Videos, Text, & Audio
Images, text, and audio are the main medium used to communicate information in a video format. Animoto does a great job integrating all three of these aspects into their program.
Regardless of what type of video you make, importing your images and videos is extremely simple. The sidebar on the left may appear slightly different, but the function is the same. Simply choose “Media” or “Add pics & vids” to be prompted with a file choice pop-up.
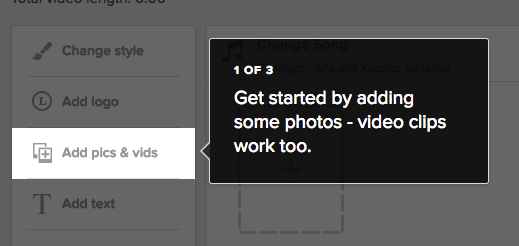
Once you import the media you want (use SHIFT + left click to select multiple files at once), the files will be available in Animoto. Slideshow videos will display blocks in the timeline, while marketing videos will hold them in the sidebar until you specify a block.
For slideshow videos, you can change the order by dragging images to a new location. For marketing videos, drag the media over the block you want to add it to until you see the area highlighted before releasing the mouse.
When all your images are in place, text is the next thing you’ll want to add. In a marketing video, the text has predetermined locations based on the template, or you can add your own with custom blocks. Slideshow videos will prompt you to add a title slide at the beginning, but you can also insert your own anywhere in the video.
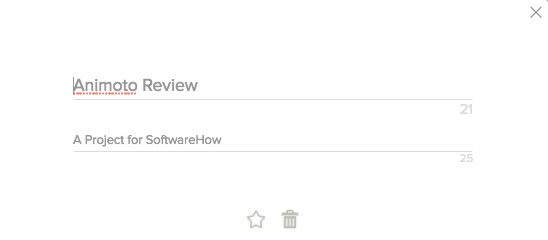
In a slideshow video, you have minimal control over text. You can add a slide or caption, but the font and style depend on your template.
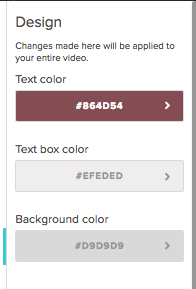
On the other hand, marketing videos offer a lot of text control. There are a couple dozen fonts (a few are recommended based on your template) to choose from, and you can edit the color scheme as needed.
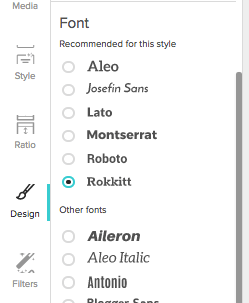
For text color, you can edit by the block or for the whole video. However, changing the video scheme will override any block-based choices, so choose your method carefully.
Audio is the last form of media to add to your video. Again, depending on what type of video you chose, you’ll have different options. Slideshow videos have the simplest choices. You can add any number of audio tracks provided you have enough image to play in synchrony. The tracks will play one after the other.
Animoto offers a good sized library of audio tracks to choose from, and not just instrumental options either. When you first choose to change the track, you’re greeted with a simplified screen:

However, you can look at the bottom of this pop-up to add your own song or pick one from the larger library. The Animoto library has plenty of songs, and you can sort them in several different ways to find what you’re looking for.
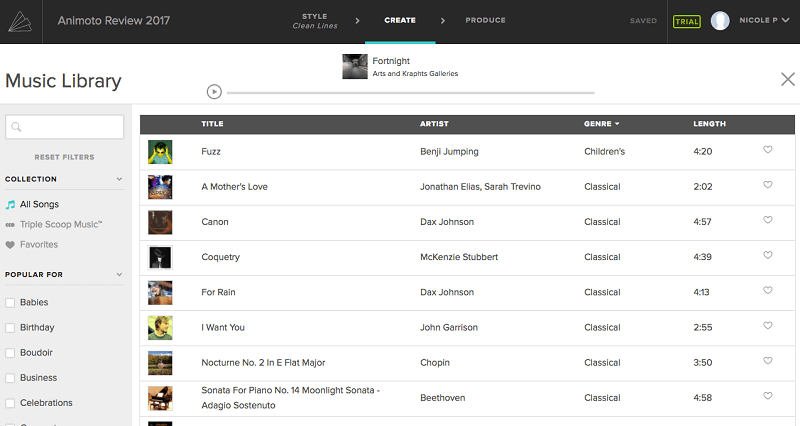
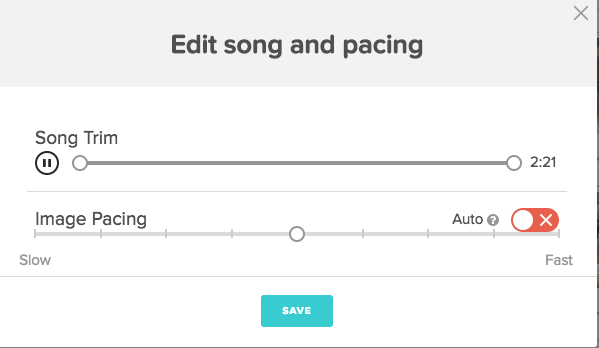
Not all of the songs are instrumental, which is a nice change of pace. In addition, you can trim the song and edit the speed at which the photos attached to it play in the song settings.
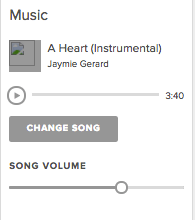
Marketing videos have a different set of options when it comes to audio. While you can only add one song, you also have the ability to add a voiceover.
You’re given a default song to start, but you can change it just like you would a slideshow video.
To add a voice-over, you’ll need to select the individual block you want to add it to and choose the small microphone icon.

The length of the voice-over will automatically cause the block timespan to lengthen or shorten according to what you record. You can record over a section as many times as you need to get it right.
However, all voice-overs must be done by block and can only be done in the program. This is great for editability and let you change snippets easily, but is less effective for large videos or those who prefer to record all in one shot. You cannot upload your own voice-over file, which is probably a good thing since you would need to split it into small clips to use anyway.
Templates & Customization
All videos in Animoto, regardless of style, use one their templates. You cannot create a video from a blank template.
For slideshow videos, the template dictates the type of transitions, text, and color scheme. There are dozens of themes to choose from, sorted by occasion. You definitely won’t run out anytime soon or be forced to reuse one unless you want to.
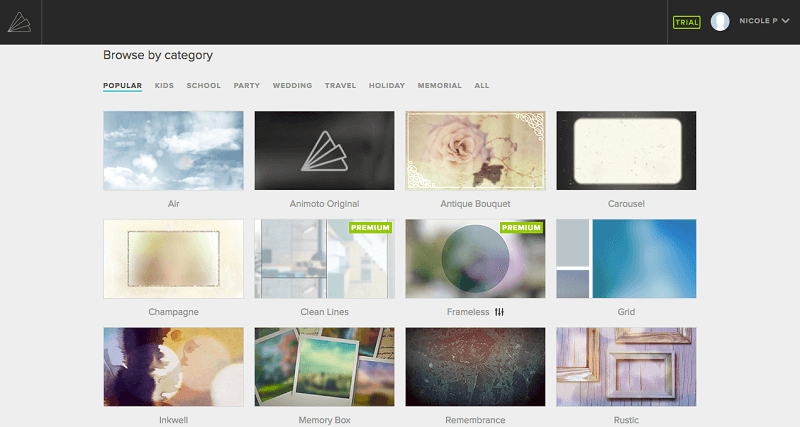
Marketing videos don’t have quite as many options, but they have greater customization features which should compensate. They also come in two different aspect ratios — 1:1 and the classic landscape 16:9. The former is more applicable to social media advertisements, while the latter is universal.

There are nine 1:1 templates and eighteen 16:9 marketing options. If you don’t like a theme, you can add your own custom blocks or delete the provided sections. However, they are generally well-laid out with well-designed graphics, so you may find this unnecessary.
As I’ve previously stated, the customization in a slideshow video is very minimal. You can change the template, rearrange assets, or alter music and text at any time, but the overall theme is fairly stagnant.
Marketing videos have a plethora of options. Besides the aforementioned text features, you can also change the template style:
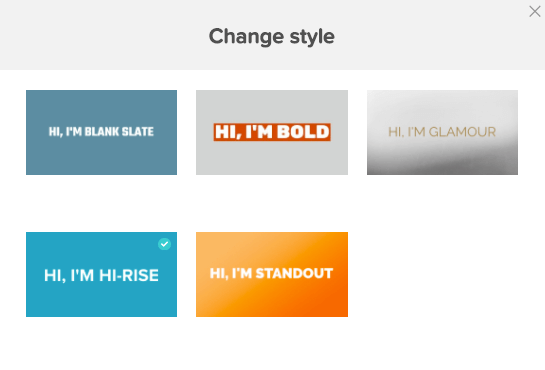
This allows you to add an extra dimension of uniqueness to your template without choosing something completely new. You can also apply a filter to the entire video from the side panel. Meanwhile, the design tab allows you to edit the overall look of your video through color.
Overall, you’ll never complain about lack of options with Animoto. Your video is your own from start to finish.
Exporting & Sharing
Animoto has quite a few options for exporting, but be aware you don’t have access to all of them at the basic subscription level.
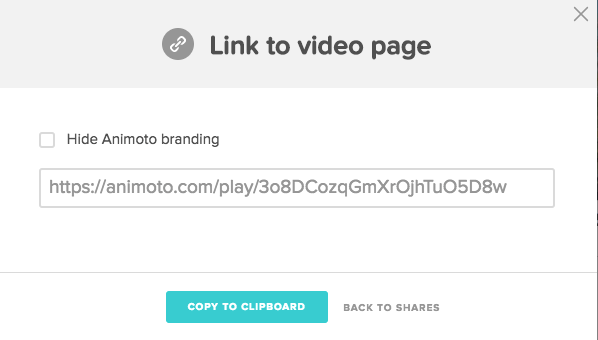
Overall though, they offer several different methods. You can export to an MP4 video file, or use one of the social sharing options. Sharing to social media will require your account credentials, but you can revoke access at any time.

As you can see, there are plenty of options. Any linking or embedding will be through the Animoto site through, which means your video is hosted on their site. You should always make sure to download a copy as a backup in case you decide to leave the service or something happens to your account.
Downloading an MP4 will let you choose from four levels of video quality (1080p HD is not available to the lowest level subscribers).
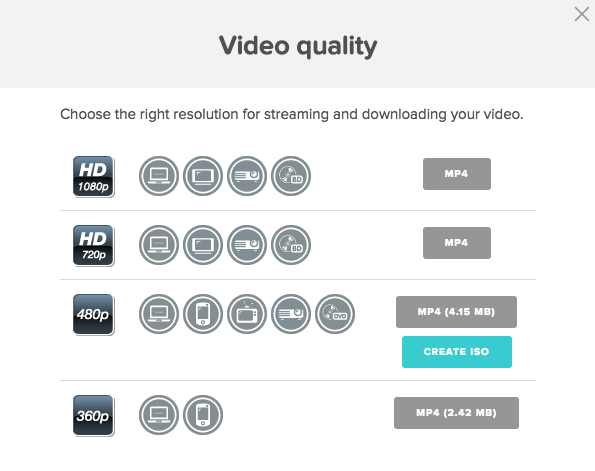
The circular symbols next to each resolution indicate what platform they would work well with. There are seven different symbols suitable for:
- Downloading/viewing on your computer or embedding in a website
- Viewing on a mobile device or tablet
- Viewing on a standard definition television
- Viewing on an HD television
- Viewing on a projector
- Burning to a Blu Ray for use with a Blu Ray player
- Burning to a DVD for use with a DVD player
Note that the ISO file type available at 480p is specifically for those wishing to burn a disc. Everyone else will want to stick with an MP4 file, which can be converted to an MOV or WMV as necessary with a third party file converter like Wondershare Video Converter.
Reasons Behind My Review and Ratings
Effectiveness: 4/5
Animoto gets the job done. You’ll have a clean and semi-professional video in minutes, and for a bit more of your time, you can edit the color scheme, design, audio, and several other features. My one complaint is the lack of an undo tool. It’s ideal for amateurs, but if you want greater editing control over your transitions and images, you’ll need a higher-end tool.
Price: 3.5/5
The most basic plan starts at $16/mo, or $8/mo/year (it comes out to $96 for the year). That’s a bit pricey to make a slideshow from a set of templates, especially if you only plan to use it once or twice. In fact, most professional video editing tools are around $20/mo, so you can get a much more powerful tool if you’re willing to pay the few extra bucks.
Ease of Use: 5/5
It’s undeniably easy to use Animoto. I didn’t need to read any FAQ or tutorials in order to get started, and I made a sample video in no more than 15 minutes. The interface is clean and well organized. Everything you need is clearly marked and very accessible. Plus, it’s web-based, eliminating the need to download yet another application onto your computer.
Support: 5/5
Luckily, Animoto is intuitive enough that I didn’t need to research to solve any problems. However, if you do have a question, there’s a great collection of resources for you. The FAQ is well written and complete to answer common questions. Email support is also available for more complex queries. You can see a screenshot of my interaction below.
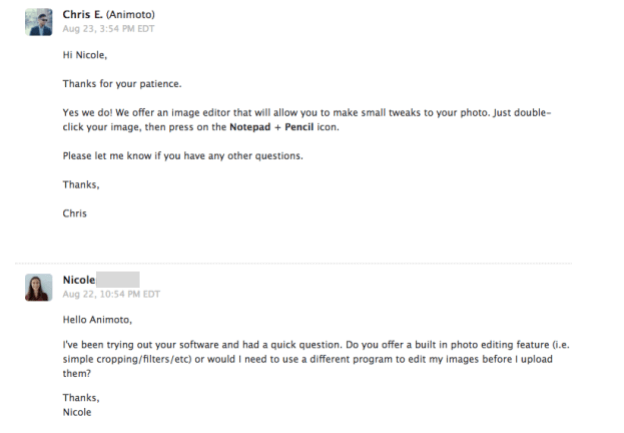
I had a great experience with their email support. My question was answered within 24 hours by a real person. Overall, Animoto covers all their bases and you can be sure you’ll get any help you need.
Conclusion
If you need to create slideshows and mini videos on the fly, Animoto is a great choice. It offers a high degree of versatility for an amateur tool, as well as a good variety of templates you won’t be quick to exhaust. You can create videos in less than 15 minutes if you’re going for the slideshow, but even marketing videos won’t eat up much of your time. Animoto is a bit pricey for an individual, so make sure you’re going to use it frequently if you do purchase. However, you’ll still get an effective and easy to use tool for your money.